
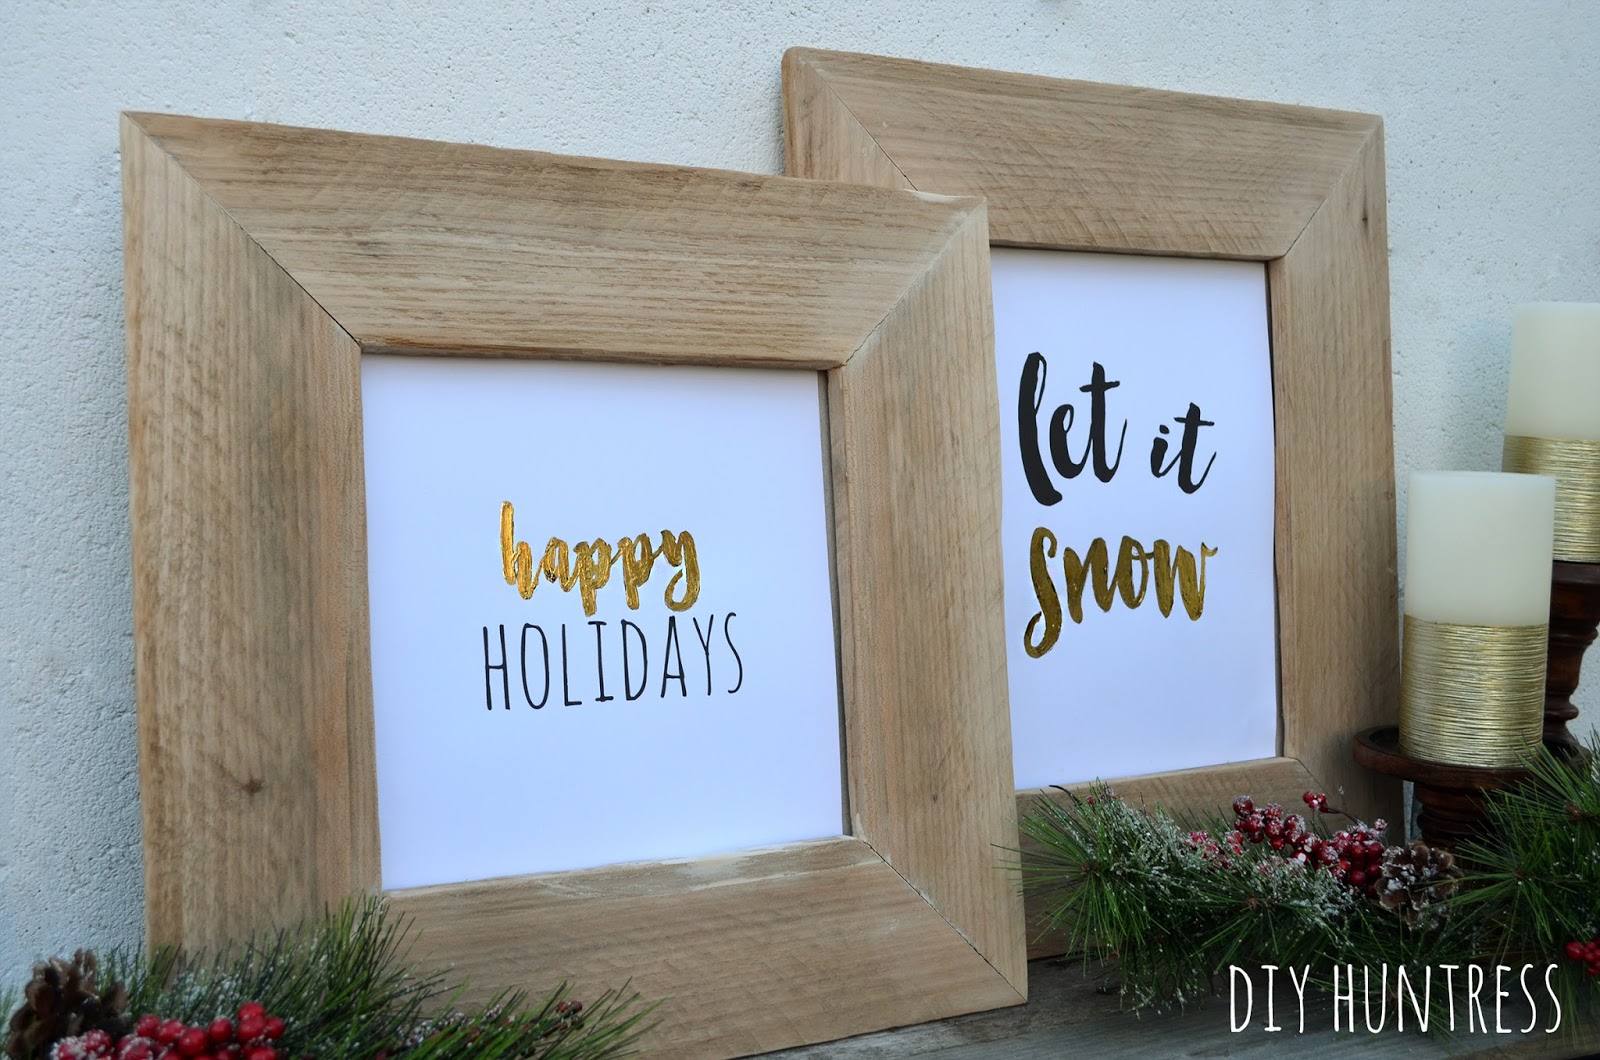
How To Make DIY Pallet Wood Picture Frames (& Free Holiday Printables)
Disclaimer: This post is pretty long, so I divided it into two parts. If you want to just learn how to build the frame, that’s “Project #1”! The printables can be found below in “Project #2”, so feel free to skip ahead if you’re just looking for those.
Let’s go! To start, here’s that pallet I had hanging around in the backyard (see if you can spy a little DIY pup hiding somewhere in there).

Lots of people have asked me how I break down my pallets… well, to be honest, my secret weapon is the Duckbill Deck Wrecker (click the link to purchase your own). Best money I’ve ever spent. You just slip it onto the support beams, and pull up to pop the board off. It’s awesome!Now, once your pallet is deconstructed… and you’ve fallen head-over-heels for the Deck Wrecker… you can begin your project!
How To Make Pallet Wood Picture Frames

Tools
Screw Gun
Sander
Router (Optional)
Materials
Pallet Boards
Wood Filler
The Steps:
1. Once your pallet is destructed and de-nailed, use your sander to sand away any major imperfections.

2. Trim off the bad ends of the boards to make measuring the frame edges way easier.

3. Once the ends are cut, set the miter saw to a 45 degree angle.

4. Cut one end of your pallet board on a 45 degree angle (this will make it easier to measure the length of the inside of the frame).

5. Once the end of the board is cut, use your measuring tape to measure from the shorter corner of the cut to the desired length of the inside of your frame. For example, I wanted my frame to fit an 8×11 photo, therefore I measured from the lower, inside angle, and made a mark 8″ down the board.

6. Next step is to switch the miter saw to the opposite 45 degree angle (to be fair, you could keep the saw where it is and just flip the board, but to be safe, take the extra step to make sure the cut is opposite of the one you just made).

7. Line up the blade with the bottom of the marking. My RYOBI 10″ Sliding Compound Miter Saw (which I’m OBSESSED with) came with a handy laser, so I used the laser to match the end of the blade with the bottom of the marking. Once you’ve lined it up, make your cut.

Easy trick to make sure you’re making the cut in the right direction – when you hold up the board, it should look like a trapezoid:
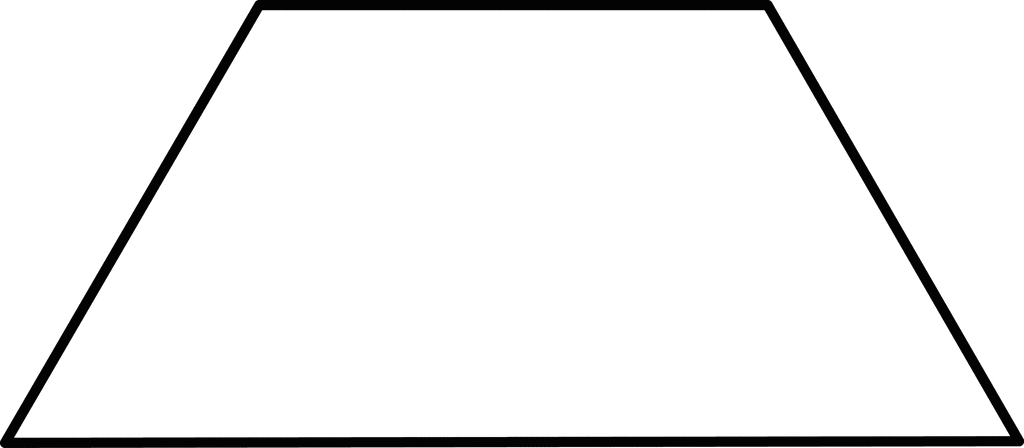
8. Once you’ve cut your piece… and made sure it’s properly cut. Re-measure the small end of the board. If everything measures up, you can use this board as a template for your next cuts by tracing the design on a new pallet board.

9. This time, make your cuts along the lines made from the template.
10. Now that you have two sides of your frame complete, you need to make the final two pieces. This is done by following all of the steps all over again, but this time, create your lines for cuts based on the next measurement. For my frame, I wanted an 8×11″ opening, so I made sure to measure the new boards based on the 11″ measurement.

11. Once all four pieces are cut, use sandpaper or a block to sand down the rough edges made by the miter saw.

12. Line up the boards to make sure all of the cuts are correct (At this point, if you have a router, you can run it along the bottom edges of the boards. This will make the insert you see on most traditional frames. For this project, I chose to skip this part and opted for a simpler frame).

13. Attach your L-shaped corner brackets to the frame with your screw gun. Make sure to place the brackets in a spot where they won’t be too high or low on the wood.

14. Once the brackets are in place, attach your picture hanger.

15. To minimize the look of the gaps in the wood (let’s face it, pallets aren’t always perfect), apply DAP wood filler to the cracks and allow time to dry.

16. Once dry, give the frames a once over with that sanding block.

And now onto the next part!
Free Holiday Printables
What You’ll Need:

Printables
Deco Foil
Deco Foil Liquid Adhesive
Tape
Frame(s)
The Steps:
1. Print out your holiday designs on card stock. If you like my designs, you can have them for FREE by downloading them from the links below!
2. Use the liquid adhesive to trace the letters you want to be metallic.

3. Use a paintbrush to evenly spread the glue across the letters. Allow the glue to dry for an hour or two before touching.

4. Once the glue is dry, but tacky, place the Deco Foil onto the lettering. You will want the colored side to face up. Rub the foil onto the lettering with your fingers or credit card.

5. Carefully peel back the Deco Foil sheet.

6. Use tape to adhere the printable to your handmade frames. By taping the design down, it can easily be changed with the passing seasons.

Phew.. lots of steps, but you’re all done! Display your project proudly and brag about it to all of your friends at your next holiday party!


I wanted to extend a huge THANK YOU to my partners at RYOBI, DAP, and Therm-O-Web for their contribution to this project. Please head over to their websites and pages! Hey, it’s holiday season, so check out their awesome offers and grab yourselves some fun gifts!
Please keep sharing those fun projects with me by tagging them to #diyhunted on social media! I love seeing what you’re making!
Until next time!





One comment