

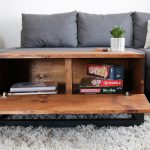
I know I cannot be the only one who is knee deep in the mud cloth trend right now. My throw pillows are mud cloth, my blankets are mud cloth, and now it’s only reasonable to expect that my furniture be mud cloth as well! Well, without further hesitation, I am beyond excited to share the plans for this mud cloth inspired wood carved side table I created with my amazing partners at Varathane and Inventables. Best part? If you’re not obsessed with mud cloth like I am, you can use any design you want on your drawer front! Let me show you how!
P.S.
If I had a dollar for every time I use the term”mud cloth” in this post, I’d be able to buy a whole lot of Starbucks.

P.P.S.
Want to download the free printable plans before we get started? You can find them here: https://gumroad.com/l/HxLbY
P.P.P.S.
Want to check this build out on YouTube? Visit my channel and subscribe!
Let’s get started!
What You’ll Need:

Tools
X-Carve or Plunge Router w/ 90 Degree V-Bit
Miter Saw
Sander
Drill
Brad Nailer
Pin Nailer (Optional)
Table Saw
Pocket Hole Jig
Tape Measure
Wood Clamps
Kreg Drawer Slide Jig (Optional)
Materials
(2) 2 x 2 x 8′ Pine Board
(2) 1 x 8 x 6′ Pine Board
(1) 1 x 12 x 6′ Pine Board
(1) 1 x 6 x 6′ Pine Board
(1) ½ Sheet of ¼” Plywood
—
Varathane Aged Wood Accelerator
(2) 8″ Drawer Slides
(1) Cabinet Pull
1 ¼” Wood Screws
1″ Brad Nails
1″ Pin Nails
1″ Wood Screws
Wood Glue
120 Grit Sandpaper
The Steps:
1. Cut your boards into the following pieces:
2 x 2’s:
(4) Legs @ 23″
1 x 8’s:
(2) Side Panels @ 8″
(1) Bottom Panel @ 16″
(1) Back Panel @ 16″
(1) Drawer Front @ 20″
(will be trimmed to 1 x 8 x 16″ later)
1 x 12’s:
(1) Top @ 20″
1 x 6’s:
(2) Short Drawer Sides @ 8″*
(2) Long Drawer Sides @13 ½”*
*Double check how much room you need for your drawer slides before cutting your drawer boxes to these dimensions.
¼” Plywood:
(1) Drawer Bottom @ 11 x 15″
2. Drill pocket holes in the sides of your panel pieces and your bottom panel. You will also need to create pocket holes on the back of your bottom panel as well.

3. Assemble your two side panels by attaching your side panels to your legs with pocket holes, glue, and pocket hole screws.

4. Attach your sides together by attaching the back panel to the two side panels with pocket holes, glue, and screws.

5. Attach your bottom panel to your side table with pocket holes, wood glue, and screws. Make sure to attach the bottom panel to the unit about 1″ up from the bottom. This will help your drawer close the right way.

6. Create your drawer by attaching the long and short drawer sides together with pocket holes and wood glue. Attach the bottom of the drawer with 1″ brad nails and wood glue.

7. Install your drawer inside your table with your drawer slides. I used my Kreg Drawer Slide Jig to help align my drawer slides. They were life savers!

8. Carve your drawer front! I used my X-Carve CNC from Inventables to help with this carve (you can find the design I used here), since I was really tight on time this weekend. The machine helped in so many ways!

If you do not have a CNC machine, you can make this design with a plunge router and 90 degree V-Bit. Just trace the design of your choice with your router. Another option is to use a small multi-tool (like a Dremel) with a V-Bit! Either way, make sure to clamp your piece no matter what you choose to do!
9. Trim your drawer front to fit the front of your piece. You will need about a 1/8″ gap on both sides of the drawer to account for expansion.

10. Attach your drawer front to your drawer box by clamping the drawer front to the box and screwing from the inside.


11. Attach the top piece with pin nails and wood glue.

12. Sand the piece down with 120 grit sandpaper.

13. Stain your piece! I used Varathane Aged Wood Accelerator and holy poop emoji, you guys… it was life changing! By brushing on this stain, it gave my piece a rustic, aged, and natural look. It’s almost like a treasure you’d find in an old antique shop!

14. Last, attach your cabinet pull to the drawer front.


Now, display proudly next to your mud cloth pillows and blankets!

One of my favorite parts about this project is how customizable it is despite it being a basic table build. It’s amazing how a small design on a drawer front can make such a huge impact!

What do you think? What would you put on your drawer front? Are you into the mud cloth trend? Just sick of seeing me write the words, “mud cloth”? However you’re feeling, leave a comment below!
Want to save this project for later? Make sure to Pin It! You can also click the image in order to download the free printable plans!

Can’t wait to see those builds!
This post is sponsored by Varathane and Inventables. While I have received compensation and product for this project, all product opinions and design ideas are my own.





I LOVE this Sam! Awesome job!
Thank you so much, Candice!
why don’t you share the CNC plans for the Drawer front ??
Hi Doug! I did, they are linked in the step about carving the drawer front. Hope this helps! 😊
Awesome build! I like the design for the carving. Has a native american look. Great job!