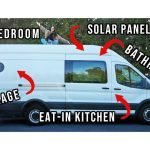
If you’re new here, I’m Sam and I’m turning my cargo van into a tiny home! So far, I’ve tackled the exterior work, the insulation, the flooring, an off-grid electrical system, and a full bedroom.
But now I’m officially taking my van build to the next level with a fully functioning off-grid bathroom. This is the part of the build that honestly feels like it’s the most ambitious.
We’re talking plumbing, a shower, a hot water heater, a toilet, and everything else you’d expect in a regular home, but squeezed inside of a teeny tiny van.
The goal is to bring the van to my husband’s race in 8 weeks, so the big questions are can we do it and can we do it in time? Let’s find out, and let’s get started friends!
This post contains affiliate links, which helps support more projects on my website! For my full disclosure policy regarding affiliate links, click here!
Want to see this build in action? You can watch my build video here (+ make sure to subscribe to my channel)!
Van to Tiny Home Series
If you want to see how we got to this place in the build be sure to check out what I’ve already done. It’s been a journey friends!
- Part 1 – Demo
- Part 2 – Exterior
- Part 3: Interior
- Part 4: Electrical
- Part 5: Bedroom
Products + Tools
Products
- AC Unit
- MaxxAir Fan
- Roof Rack
- Window Flares
- Shore Power Outlet
- Shore Power Extension Cord
- Electrical System
- Grey Water Tank
- Clean Water Tank
- Hot Water Heater
- Water Pump
- Red Gard
Check out @unakagearcompany selection of awnings here.
Tools
- Drill/Driver Set
- Dust Vacuum
- Jig Saw
- Multi-Tool
- Panel Popping Tool
- Sawzall
- Metal Sawzall Blades
- Metal Jigsaw Blades

I have never been so excited to sit on a toilet in front of so many people. If you don’t remember, we built the bedroom in our last installment of the van series and that was because I was having so much trouble getting the materials I needed for this bathroom.
But the materials have arrived and the time has finally come for me to get this done. If we thought electrical was a doozy, buckle up because the plumbing has singlehandedly tried to break me as a human.
1. Build A Cabinet

Luckily we started with something I am much more comfortable with, building a cabinet. I broke down the lumber starting with the table saw.


Then I moved to the track saw and then jig saw to make the smaller cut outs.

Then I used my Kreg Foreman to make quick work of all of the pocket holes I’d need to assemble it.

Everything in this van will be pretty so I couldn’t skip edgebanding. Can you see how blissful I look before I realize what’s about to happen?

I was still feeling great about it while I sanded.


Once it was assembled it was time to install it.
I wanted to build the cabinet for the sink before I built anything else in this space because I needed to be able to run some of the plumbing lines through a hot water heater through the sink and then into the shower wall.
I didn’t want to actually run any of that plumbing until I knew where it was going. Luckily, I had already built the box that all of the plumbing stuff needed to go in. That happened when I was working on all of the electrical, and before I made the bedroom.

This is such an insignificant step but it felt so symbolic to me, this is the first panel I put up to start the process of closing the walls, which was wild!
2. Bathroom Shower Stall


It was officially time to start framing out the shower/bathroom stall. I had been waiting to get to this step for so long.

As you can see, we now have a toilet, which is great because this is exactly what I was waiting on to get here.
In order to finish framing out the shower, I needed the dimensions for the toilet because I really wanted the toilet to be able to slide into the wall and under a bench while it was not in use.

In order to build the shower stall, I took a bunch of 2 by 3’s, drilled some pocket holes in them to basically make freestanding walls.


Then I attached those walls to the side of the van, and closed them up with plywood to make a shower stall.
3. Build a Toilet Bench/Cabinet

I thought it’d be really cool to build a bench so I could hide the toilet when we’re not using it and then put a hatch in the wall in order to then pull the toilet out on drawer slides when we needed to use it.
I wanted to save space in the shower area and to make it look a lot cleaner. I’m not going to lie, in hindsight, I kind of wish I didn’t do this.

But before I got to that point, I was very excited about it!

It was flush right up against the driver’s seat, which presented a problem for when Chris has to drive, because I needed to make sure he could adjust the seat comfortably.
4. Plumbing with Dad

Dad was finally able to come help me with plumbing but unfortunately on this day, nothing was going right.


So I did what I do best and drilled some holes.


Essentially, I left dad to figure out what fittings would and wouldn’t work and I continued on with closing up the shower.


Dad and I are really good at dividing and conquering, so while he figured out how to make the impossible fittings fit together, I wired up some more lights because I was tired of working in the dark.


Can we believe I wired all of these lights myself? So proud, and the best part is that it’s not even pulling that much power. We are super efficient for when we’re off grid.
5. Toilet Hatch Door


Once the door for the toilet hatch finally arrived I was able to install it.


Up until this point I was really feeling confident about finishing the van in time for our Nationals deadline. But when things (like this hatch door) I had ordered for the bathroom were taking 3 weeks to arrive instead of the estimated 5 days, I truly started to panic.

But we kept working. So my dad drilled through my floor! He made the hole for where the shower drain will go.
6. Rebuild Things That Were Already Done

So it turns out that the hatch door I ordered to specific measurements came in a bigger size than I had ordered. But because it would take so long for the correct size to arrive I had to just make things work. So I rebuilt this shower wall a bit, added some additional bracing and cut the opening bigger to fit the door.


I also had to build a riser for the cabinet, which wasn’t the end of the world but just an additional step that I wasn’t planning for.


While I redid work I had already done, Dad finished up the drain in the back and we got plumbing lines in the shower!

Next I did a dry fit to make sure that the toilet would actually fit through the door. Spoiler alert, it fit!
7. Install The Grey Water Tank


Here we have my dad underneath the van drilling a hole so we knew where to put the shower drain.


This drain will go to the gray water tank which will be mounted on the bottom of the van. The gray water tank will collect all of the waste water from the shower and sink. We won’t need it for the toilet because it is vacuum sealed.
8. Install the Awning

It’s officially hot season so it seemed like the right time to install the awning. This was the first of three mounts that I installed.

Although the awning was very easy to install, it was really heavy and did require an extra set of hands to mount it.


Like how awesome is that? Now even when it’s super hot I can still set up my tools in the shade and work on the van.
9. Install the Sink Countertop
Although it was really nice to take a break from the plumbing portion of this build it was time to go back to the plumbing portion of this build and make the countertop for the sink.


But first there was a little woodworking to do. I cut my butcherblock countertop down with the track saw, marked out where the sink was going, drilled holes to get my jig saw blade through and cut out the hole for the sink.

I finished the countertop with Halcyon.
A quick note about the layout of the van. I did decide to keep all of the plumbing to one side of the van which is why the sink is next to the shower, rather than across from it and in the kitchen. Since this is my first van build I didn’t want to over complicate it.
Putting all of the plumbing on one side of the van means that if there is a leak or something goes wrong I can easily fix it because it’s all running on the same cold water line.

You know what would’ve been smart? Pre-staining all of these pieces before hanging them. But I keep not learning my lessons so what’s one more lesson to re-learn?


Next I caulked around the countertop so I could install the sink and the faucet.

It’s so helpful to be a tiny and ambidextrous human. But in all seriousness, I am so happy to have a sink in here.
10. Finish the Shower

So, when I was doing my van research, a lot of people told me that I would probably regret having a shower in the van. But we drive to a lot of races and I really wanted Chris to have a place to shower so he doesn’t to drive home all sweaty.

The one caveat being that because I had to put all of the plumbing underneath the shower, I did have to raise the floor a little bit. When I had Chris stand in it the other day to test it out, he kind of just barely fit. So, I’m really hoping he actually uses the shower once it’s done because it was a lot of work.

Dad popped over to finish the plumbing and get the water run to the shower.

While I worked on electrical for the water heater.
11. Fill the Tanks

So surreal that it was finally time to put water in the van! Here’s where I hook up the hose.

And as you can see the tank was filling up.

We did have a small leak in the pump line.


But we also had running water!

There was also a leak under the sink, so we had to replace 2 fittings. But the shower was perfect with no leaks, so I was finally able to start closing it up.
12. Close Up The Shower


At this point in the project I was really ready to be further along, so it was time to just get it done.


In hindsight I put this shower pan together in the same way I would do a shower pan in a house and that probably wasn’t the best plan.


My friend Chris at Make Everything Shop who is an amazing metal fabricator, generously offered me a commission for a custom fabricated shower pan and I really should’ve taken him up on his offer.


But you live and you learn and I’m still proud of the light in my shower.


Anyway, after adding the shower walls, closing up the floor, and doing all of the things I would do in a normal bathroom project, it was time to waterproof the entire shower stall, which I did using Red Gard. This is so important. You really don’t want any water leaking into your camper van so I made sure to get everything sealed up really well.


And then once that was done, it was time to add the shower panels. The shower panel system I used was actually really awesome. It is made for residential showers. They are essentially these large sheets that you can glue onto your existing tile or your wall in order to make your shower waterproof and pretty.

And in a normal application, these things are super easy to install because you’re working with straight walls. But because the walls in this van are not straight, in fact, nothing in a van is straight, I did end up making templates.

I used foam board insulation that I was then able to transfer to the panels before cutting them out and attaching them to the wall. And this was so important because honestly, as cool as these panels are, they are not cheap. I only had one extra and I did not want to mess it up.

Yes, I am wearing sunglasses because when you cut these they throw tiny pieces of plastic and I couldn’t find my safety glasses.


While I wanted to be really excited that the shower panels were up, there was still so much work to be done, including but not limited to a shower floor, adding a door, waterproofing everything, adding trim to make everything look nice…there was still a lot of work to be done.
I think from the day I started the shower panels to the day that I finished the shower was easily over a week of work. Hard to tell from these few photos but this one was a doozy.


So, in terms of the shower pan, like I mentioned before, I wish that I took my friend up on his offer, but I didn’t. Instead, I use these lightweight mosaic tiles so that I could still slope the floor for it to drain.


Although, in hindsight, I realize that if I’m parked in a place that is not level, I don’t really know how the slope I made is supposed to work, which is why I mentioned that I made a lot of mistakes in this portion of the project.


I’ll just have to check in with you guys after our first camping trip to see if this thing is actually going to drain the right way or not. However, the mosaic tiles came out great, and I think that they look awesome.
13. Toilet Drawer Box & Close Up Some Walls


I’ve gotten a lot of questions about the weight of this build. So far I’ve just been keeping track of how much plywood I’m using and I’m keeping a rough estimate of the weight added. Once it’s all finished I do plan to take it to a weigh station because I’m curious about the final weight.
But here is my toilet drawer box! It of course also got edgebanding to finish it!


I decided it was time to close up some walls because with the exposed wiring I just keep wiring things. So I figured it was time to leave well enough alone and put up some more walls.


Putting up walls has been so good for my personal well-being. With all of the plumbing delays it felt like I was really stuck on this build and seeing walls up really makes the progress of this project so much more visible.
Finishing Touches


I finished up the trim and installed the shower door.

The door really did pull together the final look of the shower. I’m not the biggest fan of the install it. It’s basically a really heavy duty double sided tape, so we’ll stay tuned on how I feel about that later on.


I finished my pride and joy, the toilet box and luckily it all fit and will hold a full human. What a relief.
Here We Are
Wow friends, here we are with a functioning bathroom. It’s so funny becuase in hindsight, I really thought that the electrical portion of this van build would be the thing that just destroyed me. But I can confidently tell you that it was the plumbing that broke me.
There is still so much that needs to be tackled here before we can really call the bathroom finished. The sink cabinet still needs to be closed up, final coats of sealer need to go on the walls, the bench needs to be closed up, and there are still tiny little leaks that are happening under the sink that need to be addressed.
If we’re looking at the positives, the bulk of the bathroom work is done. I think the shower looks great, I’m stoked on the toilet and I’m so happy that the hot water heater is working.
But you know I like to keep it real here. With all of the setbacks and all of the work that had to get done, combined with waiting for things to get here before I could move onto the next step, and then literally getting an entire bedroom done in the van before the plumbing was even done. It was about 9 weeks of work from the start of this bathroom.

So if you were counting, unfortunately, we didn’t get the van to Nationals. But we did get Chris to Nationals, and we now have a National Champ in the house! I am so proud of him and even though we didn’t get to bring the van with us, we’ll be able to take this National Champion to many more races in our tiny home on wheels.
As for what’s next, we’ve just got to build the kitchen, and take care of some finishing touches to make everything look pretty.
That being said, friends, thank you for all of your patience throughout this process. This has been the most frustrating yet rewarding project I think I’ve ever worked on in my life. There is also a lot going on in my house as well while I’m working on this van which we’ll talk about very soon. I cannot wait to share updates with you. Until then Happy DIYing Friends!
Save this for later
I hope you enjoyed this project! If so, make sure to Pin It for later!