Over the past few months, I’ve been transforming my empty cargo van into a tiny home on wheels! Complete with insulation, flooring, off-grid power, plumbing, and even a small bathroom. But this project is the one I’ve been most excited for: building a DIY tiny kitchen from scratch.
In this episode, I’m tackling cabinet building in a space where nothing is square, adding a faux limewash finish, and installing the countertops, drawers, doors, and cooktop to make the kitchen fully functional for van life.
This build has challenged me more than any before, but it’s finally ready to hit the road, and just in time for an upcoming event (and a special guest joining the trip). Let’s get started friends!
This post contains affiliate links, which helps support more projects on my website! For my full disclosure policy regarding affiliate links, click here!
Want to see this build in action? You can watch my build video here (+ make sure to subscribe to my channel)!
Van to Tiny Home Series
If you want to see how we got to this place in the build be sure to check out what I’ve already done. It’s been a journey friends!
- Part 1 – Demo
- Part 2 – Exterior
- Part 3: Interior
- Part 4: Electrical
- Part 5: Bedroom
- Part 6: Bathroom
Materials + Tools
Materials
- TotalBoat Halcyon Finish
- TotalBoat Fairing Compound
- Cooktop
- Induction Cookware Set
- ¾” Plywood
- Cabinet Hardware
- Edgebanding
- Wood Finish
Tools
- Drill/Driver Set
- Dust Vacuum
- Jig Saw
- Multi-Tool
- Cabinet Hinge Jig
- Sawzal
- Metal Sawzall Blades
- Metal Jigsaw Blades
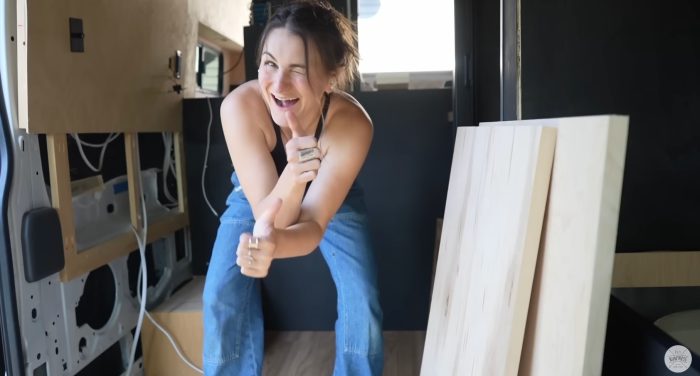

You guys, I cannot believe we are finally tackling the van kitchen!
Cabinets

This really has been the most challenging yet rewarding project I’ve ever worked on. I’ve actually really been looking forward to this part of the build because it’s the part that seems easy to me.

But I’m not going to lie, getting close to the end of this project is starting to make me a little sad.

I can confidently say this is the hardest project I’ve ever done.

But also the coolest.

Drawers


So basically, we’re building a bunch of boxes, you know, that thing that I love to do.

Fun fact! Did you know that my first home was actually a 325 square foot apartment in New York City?

I learned a lot about saving space and getting creative in that apartment.

Every part of this build has forced me to really slow down and figure things out creatively. But this van honestly feels like home.

And just like that, we have drawers!
Built-In Shelf


I know I keep comparing this camper van build to working on a house, but it really is such a similar process.

For example, I’m using the empty space between the van’s studs to create a shelf for things like laptops and other office items since I’ll be traveling and working from the road.

It’s essentially the same concept as using the wall cavities in a home to build a recessed shelf.

Once you’ve lived in a small space, it’s hard not to see every nook and cranny as an opportunity to create more functional storage.


If there’s one big positive to come out of this build, it’s that I’m now completely addicted to wiring things up.
Hole Patching

Of course, this entire DIY project wouldn’t be a true DIY without at least one Frankenstein moment, and in this case it was piecing together all of the plywood panels on the walls.

So, I reached out to my friends over at TotalBoat, who sent me some fairing compound to blend everything together.

At this point, the walls were basically a patchwork of seams. They looked pretty from afar, but up close…they definitely needed some help.

It was weirdly therapeutic, and kind of symbolic, too. This entire build has been full of messy moments, but as I was smoothing things out, it hit me that this is exactly what the project represents: a bunch of rough spots slowly coming together into something whole.


When you make a mess or take on something hard, you figure it out, fix it, and eventually everything starts to blend together. I guess that’s what this whole build has been about.
Interior Finishing

I think that’s what this whole project has been about. Taking a bunch of rough parts and watching them slowly blend into something that feels like a complete vision.

You guys, all of that sanding may have turned me into a reflective person…don’t worry I still hate sanding, but I do love this stain.
Benchtops


What do you think of my new countertop?

Yes, I am obsessed with it.

I did feel like it was time to cover up the toilet since it is approximately 2 feet from my kitchen.

So I used the leftover piece of countertop I cut off to make a small bench that folds open. That way, I can still access the toilet when I need to, plus, it adds a little extra storage. How’s that for being crafty with space?
Stovetop Prep

They say the kitchen is the heart of the home, and I don’t know who “they” are, but you know what? I believe them. Whoever said that, I’m with you.

Working on the kitchen in this van has honestly made my heart grow about ten sizes. The more time I spend on this build, the more I see my personality and style coming through.

It’s finally starting to feel like a tiny home and not just one I’m proud of because I built it, but one I’ll actually feel comfortable living and traveling in for long stretches of time. And that makes me so excited.
Faux Limewash


This is my first time trying this faux limewash finish technique, and I started by priming the walls.


I’m pretty sure I’m obsessed. I think we’re going to do this in the house at some point.

So, if you’re interested in a tutorial for that, let me know in the comments because it was a lot of fun.
Sealing the Countertops

Next I used Total Boat’s Halcyon, it’s literally perfection. I pretty much use this on all of my projects and I’m honestly obsessed with it.

It’s really user-friendly, and you can build the coats pretty quickly to get the finish you want on your piece in a relatively short amount of time, oh yeah, and it looks awesome.

And bonus points for drying quickly, because after doing a bunch of coats in one day, I was able to get the cooktop in the next day, which truly felt like a big personal win.
Cabinets + Drawers


There were a lot of moments in this van build where I felt really down on myself. But getting to this point in the process, where every single part of this kitchen build felt like home to me, made all of that go away. Like using my cabinet hinge jig, I was finally in my zone.

It almost made me forget how horrible doing the plumbing in the bathroom was, at least for five minutes, because the kitchen just went so smoothly.

And this was honestly the first time I could look at this van and say, “Yeah, I would totally do this process again.” Which is wild, because this has been the hardest thing I’ve ever done.

But maybe that’s why I’m so addicted to doing projects in the first place? That feeling of completing something that felt super challenging is kind of unmeasurable, if we’re being honest.


At this point in my DIY carpentry and woodworking journey, I could probably build drawer boxes and cabinet boxes in my sleep.
Building A Shelf

But one thing I could not build in my sleep is this cool shelf that’s going to have a light in it. Guys, I wasn’t kidding when I said I’m literally addicted to wiring things up now.

For some reason, I thought it would be really cool to put a shelf in this kitchen instead of a cabinet.
I know cabinets have a lot more storage space, but it already feels so tight in this van that I really wanted to have some open shelving, somewhere I could put things out and actually see them when we’re parked.

But yeah, I decided to be extra and wire up a light inside of it. And honestly? I’m thoroughly impressed with my skills. I’m not going to lie, if you’d asked Sam eight months ago to do this, she would’ve said, “Oh, heck no. Absolutely not.”

But Sam now? “You want me to wire up a floating shelf? I got you. You want me to wire up an entire house? How hard could that be?” I think I’ve created a monster.

But hey, that’s the wild part of this whole journey. One month I’m hating life, questioning every decision, wondering why I ever thought it was a good idea to put a shower inside a van.

And the next day, I’m on cloud nine, adding a little puck light under a floating shelf and pretending I’m a master electrician. It’s just a wonderful roller coaster of emotions.

It was so easy to just spray the finish on once it was ready to go. Easy electrical, easy finish!
Finishing Touches


At this point it was time to install the cabinets and drawer fronts to get this kitchen storage functional.


The cabinet hardware was an easy step too, just reassuring me that this build was really getting so close to the end.


Will I ever be able to believe that I can wire up things? Like I can just casually make a floating shelf with a puck light now, ok?
The Reveal


When I started this van build, I thought it would just be another project, a fun challenge to tackle and see how it goes. But it’s honestly become so much more than that over these past eight or so months. Like, this has taught me so much patience and problem solving and really how to find a lot of beauty in imperfection.
There were so many days of this build that I wanted to quit and so many nights I questioned it. I mean, I missed a major deadline that I was so excited to meet. But honestly, being able to look at finished walls and cabinets, and a kitchen that I built, designed, and made with my own hands inside of a cargo van, I just wouldn’t trade a single moment of the chaos that got me here.
And honestly, with this big event that I’m so excited about just around the corner, I can finally say that I’m actually truly truly confident that this tiny home is going to be ready for its first big adventure.
There are still a few things that we need to finish. Obviously, the elephant in the room being the ceiling and some trim work, but that will happen next, which will be the final installment in this van series. So, make sure to stay tuned so you don’t miss the final reveal. Let’s see this through together friends, and in the meantime, Happy DIYing.
Save this for later
I hope you enjoyed this project! If so, make sure to Pin It for later!