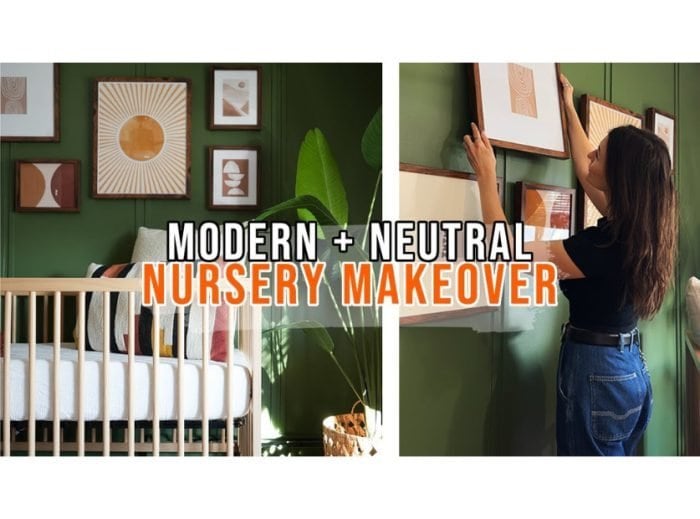
We recently got the best news ever! My little brother is coming home from the Air Force! But it gets better than that, he and his wife are making me an Auntie! Jordan has been away for the past 4 years as an active duty airman and now that they’re coming home they’ll be staying with my parents while they figure out what their next move is. I was so happy to help them out and take on the ultimate challenge of transforming a spare bedroom and into the cutest nursery for the newest member of our family. I only had a few short weeks to do it, so we stuck to simple DIY hacks to make it happen, keep scrolling to see the transformation!
This post contains affiliate links, which helps support more projects on my website! For my full disclosure policy regarding affiliate links, click here!
Want to see this build in action? You can watch my build video here (+ make sure to subscribe to my channel)!
Tools + Materials
Tools
Materials
Decor
- Bamboo Shades
- Ceiling Fan
- Changing Table
- Crib
- Crib Mattress
- Curtains
- Curtain Rod
- Dresser
- Floor Lamp
- Floor Pouf (Leather)
- Floor Pouf (Knit)
- Gallery Frame Set
- Lumbar Pillow
- Knit Pillow
- Rocking Chair
- Table Lamp
- Throw Blanket
1. Everything Must Go

Before I could get into transforming this room, everything had to come out. There are 3 bedrooms like this at my parents house, they’re full of memories from our childhood and questionable design choices.

Definitely should’ve asked for some help with this part…oops!

The blinds had to come down so they could be replaced by something better suited for the space.

Before I could make the big changes I patched the holes in the wall that were left behind.
2. Accent Wall + Painting

Using my miter saw I cut down the lumber for the accent wall.

I wanted to give this wall a custom feel without having to deal with custom pricing or any skills beyond using my tape measure, miter saw, level and nail gun. Basically I took ¼” thick strips of molding and used a spacer to make sure they were evenly placed on the wall.

I did measure and pre-plan where the strips would go and just used a pencil to mark the wall so everything would be even when it was done.

The biggest trick to doing an accent wall like this is caulking along each strip to make it look really finished and professional.

It’s so annoying and tedious but it really makes such a difference and fixes any gaps or nail holes and really tidies it up before you apply paint.


Choosing paint can be tricky but I don’t regret this color at all. It looks very different in morning light and afternoon light but I think I might be a fan of green now.

For the rest of the room I used the color grey mist because I used it in the guest room and my parents are obsessed with it.

I love the way it turned out, literally so cute!
2. Decor

Before coming in with the furniture and really decorating the space I had to clean up from the messy part of the project.


New shades went up first and then curtains.

Next I did cardio, I mean assembled the crib. It should count as cardio though, I legit broke a sweat putting it together. Tiny humans need so much stuff for being so small!

You guys, how cute is it?

Next I got the soon-to-be grandparents involved. Mom helped me get some artwork into frames.

Dad was supposed to be helping with the ceiling fan and the door, but instead he was doing quality control on the rocking chair and leather pouf. He approved.

We picked this dresser with a changing topper, which I think works perfectly.


All of the light fixtures in the room have smart bulbs so they will be able to control the ambiance in the room to fit their needs.
The Big Reveal

The reveal was almost too exciting for me.

A reminder of where this space started.

I think we nailed it…

They think so too!


You guys, this room is the sweetest and coziest little nursery ever. I cannot wait for Jordan and Isabel to be home so soon and I cannot wait for them to bring home their sweet little baby. What a year this is going to be. I love doing projects for my family, but this one was extra special. I hope this project inspired you to tackle a space in your home, especially if you’re a weekend warrior out there, something like this is totally doable in a weekend and the transformation is so dramatic! There will be more projects coming, so stay tuned friends, and until then, Happy DIYing!
Save this for later
I hope you enjoyed this project! If so, make sure to Pin It for later!


