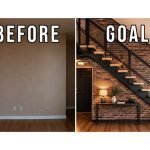
The garage shop was supposed to be a 2 month build project and it has taken over a year to get to this point. But we are finally finished with construction and ready to make it a cozy little HQ for DIY Huntress. So that brings us to this wall, it was just way too boring and blank. Brick felt like the right move but when I priced it out the materials alone would cost me over $1,500! But your girl loves to save and I found a way to get all of the materials for $250 and I am loving the result. So if you’re looking to have a really awesome custom brick wall but also not trying to break the bank, this project is for you.
This post contains affiliate links, which helps support more projects on my website! For my full disclosure policy regarding affiliate links, click here!
Want to see this build in action? You can watch my build video here (+ make sure to subscribe to my channel)!
Tools + Materials
Tools
Materials
1. The vision


As you can see this wall was just begging to be DIYed. So with my blank canvas it was time to get started friends.
2. Cut panels

In an effort to save $1,250 I am going to make these MDF brick panels look like real brick.

So I started by using my jig saw to cut the half bricks out where I’ll connect the two panels together.
3. Demo

Before putting the panels up I had to remove the trim around the windows.

I also removed the trim along the workbench so I’d truly have a clean slate of a wall to mount the faux brick.
4. Install the Brick Wall

These panels are no joke, really heavy. So I used a good amount of DAP’s heavy duty construction adhesive, and I started by applying it to the wall.

I also applied it generously to the back of the panel before mounting it on the wall.

Then I placed this first panel in the middle, between the two windows. Don’t worry we’ll uncover those in a bit, I have a plan…

I used screws to help keep this in place while it was drying. I did not want this heavy panel coming down while I was waiting for the adhesive to dry.


Then I was able to use my router to cut out the window boxes. (Don’t forget to use a respirator when cutting MDF indoors.)


I installed the other panels in the same way, with construction adhesive and screws.

Then I used my multi-tool to cut the peak to align with the roof.

Putting these panels up did feel kind of like putting together a jigsaw puzzle. As you can see I aligned the angle correctly for the top piece on the right side but I was a few rows short at the bottom. But I bought 4 panels, so that was enough to piece it together. I did have to work around my electrical box with the left panel but I used my multitool again to make those cuts.


It was just filling in the missing pieces and cutting out the window holes to complete instal of the panels.

This was the progress after day 1. I was super happy with how it was turning out.

I did have to dig through the pieces I had thrown out to find all the off cuts to fill in this section below the workbench as well as along the sides. Totally worth it though, with only one full panel left I was not going to be buying anymore material.


From here it was mostly just puzzle piecing the rest together, applying adhesive and screwing the pieces into the wall.

I also stained the 2x4s at the top of the wall and tucked in all of the wires. The little details truly do make all of the difference.


I let the adhesive set for 24 hours from when the last pieces of paneling were put up. Then it was time to remove all of the screws. Of course I had to sand all of the screw holes as well to smooth them out.
5. Making the Brick Look Real

I decided to use plaster to fill in between the panels instead of drywall compound, mostly because plaster doesn’t need to be sealed and it looks more natural.

I mixed up a small batch of plaster. You’ll want to work in small batches because it sets really quickly.


While I was working on the top I used a small bucket because it was easier to carry up with me.

This part of the process was really fun because it didn’t have to be neat or calculated. You just have to make sure to cover the seams and work kind of quickly to make sure it doesn’t set before you use it.

I was going for a vintage and weathered look so the plaster really worked well for that. Any spots that had too much got sanded back with a sanding block and if you end up with spots that didn’t get enough plaster you can just add more.
6. Painting a Mural

I have been dreaming of putting my logo or some sort of mural on a brick wall in the shop since we moved into this house 3 years ago, so it was surreal to finally be at this point. I projected my logo onto the wall and started by tracing it out.


Fun fact, I actually asked my patrons over on Patreon to help me decide what to put on this wall and we all decided that an iteration of my logo would be best. Come check it out, we have a fun time over on Patreon!

I might be biased but I think it looks so so good.
7. Finishing Touches

All that was left was finishing the trim around the windows. I used my miter saw to cut the 45 degree angle that I needed.

Then I used my brad nailer to attach the trim to the wall.
The Reveal


Can you believe we got this custom wall for only $250? It looks like a real brick wall and I’m so happy with how it turned out. More than that I’m so happy to have a creative space, studio, and workshop to create more projects in. This is our space friends and I’m so excited for what’s to come next. There will be lots more projects so stay tuned and until then, happy DIYing!
Save this for later
I hope you enjoyed this project! If so, make sure to Pin It for later!