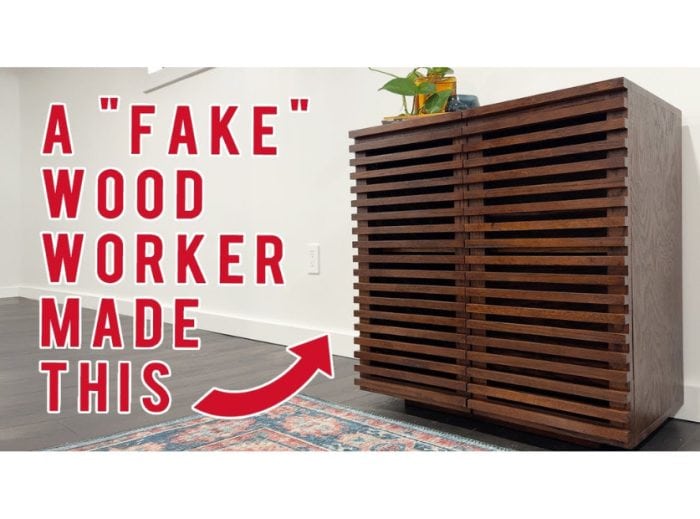
If I had a dollar for everytime someone said I’m not a “real woodworker” because I’m a DIYer, I’d have enough money to pay for a really fancy woodshop filled with fancy woodworking tools. Doing It Yourself can mean so many things. But I started my making career with just 3 power tools, and I showed you all how to do the same. So we went back to the basics with this project and used only a circular saw, a drill/driver, and a sander.
I clearly have more than 3 power tools at this point, and don’t get me wrong I love all the tools I have, they are more convenient and I have a streamlined workflow in my bigger shop. But that doesn’t mean you can’t make great projects without all of that. For this cabinet build I offer a few optional tools that can help make the build easier, but they are just that, optional. You can absolutely make a great looking cabinet with just a circular saw, a drill/driver and a sander. Keep reading to see how, let’s get started!
This post contains affiliate links, which helps support more projects on my website! For my full disclosure policy regarding affiliate links, click here!
Want to see this build in action? You can watch my build video here (+ make sure to subscribe to my channel)!
Tools + Materials
Powertools
Accessories
- Kreg Rip Cut
- Kreg Accu-Cut
- Kreg MortiseMate
- Kreg Concealed Hinge Jig
- Kreg Shelf Pin Jig
- Kreg Pocket Hole Jig
- Kreg Cabinet Hinge Jig
- Iron (For Edge banding)
Materials
- ¾” Plywood
- ¾” Square Dowels
- 1×3″ Oak Boards
- Edge Banding
- Hinges
- Stain
- Finish (use this link for auto-discount in cart)
- Shelf Pins
- 24″ Clamps
- 36″ Clamps
Plans
Click here for the link to the plans for this build.
1. Cutting the Cabinet Pieces from Plywood


First I used my table saw as a workbench (ha!) to cut the plywood down to size.

I used my circular saw to cut down the plywood for the cabinet carcass. Optional: I used the Kreg Rip Cut accessory to help make repeatable cuts. But keyword here, optional. You can also make these cuts using a board and clamps or a track.
2. Making Plywood Look Like Solid Wood


Edge banding is such a great trick to make plywood look like solid wood. All you have to do is use an iron to adhere it and then hand sand the edges to blend it into the plywood.
3. Joining Plywood Together


There are lots of ways to join wood together. For this project I used the Kreg MortiseMate which is really great because you only need a drill to make the mortise. If you don’t want to get this accessory you could also use pocket holes or just use screws through the the face frame and hide the screws later.


After dry fitting the cabinet together it was time for glue.


If you don’t have longer clamps I would recommend buying some if you’re going to use mortise and tenon joinery. Or you could use different joinery, like pocket holes. I used pocket holes on the back as you can see in this photo, but they’ll be hidden since they’re on the back of the cabinet.

After the glue dried, we’ve got ourselves a box! That’s all cabinet building is really, building boxes.
4. Making Cabinet Doors

I used the circular saw and a straight edge to cut all of the pieces for my cabinet doors. If you don’t have a straight edge or a track you can use a spare piece of wood or a carpenter square, or whatever gets the job done.

I didn’t use plywood for the doors. I went with a slat wood look so I used the circular saw to cut those pieces.


Using an accessory like the MortiseMate is definitely optional but I highly recommend it. It really helps align everything for the cabinet doors which can get kind of tricky.

Since the fronts of the cabinet doors will be slats we really only made door frames, so hiding the joinery on the inside of the rails and stiles is a simple way to go.

Next it was time for glue.

Then clamps for it to dry.

At this point it was time to break out power tool #3 and sand these frames.


As another optional accessory (one that is no longer optional for me) I used a concealed hinge jig. I have probably used this jig 50 times at this point and I won’t be installing hinges without it, but that doesn’t mean you can’t go without if you don’t want to use it. (But I highly recommend it!)
5. Building a Cabinet Base


For the base of the cabinet I used pocket hole joinery. If you don’t have a pocket hole jig you could totally use screws and cover the screw heads with dowels or wood filler.

I drilled holes into the top of the base so I could attach it to the cabinet later on during assembly.
6. Customizing Cabinet Doors
During this part of the build I was wishing that my 3rd power tool was a nail gun because it was tricky installing the slats without nails. But we got creative and figured it out.


I used ¾ inch square dowels that I got at my local home improvement store for the slats.Then I applied CA glue and accelerator to bond them to the frame.


Then I used a spare piece as a spacer and repeated the pattern down the rest of the frame. At this point I wasn’t too worried about the length being off, I made sure to align one side but I’d be going back later to trim down the other side.

In hindsight a nail gun would’ve been great for this part of the project and I might still go back and reinforce these pieces with nails. But I promised this would be a 3 tool build so a nail gun isn’t necessary, but I’ll keep it real, it would’ve been a great option.

Once all of the pieces were glued on I used a circular saw to trim them down to be even with the frame.

Then I did a quick hand sand to get rid of any splinters or imperfections before it was ready for stain.
7. Installing Shelves

I decided to use a shelf pin jig so I could install shelves inside the cabinet that could be adjustable heights.
8. Staining

Staining was kind of a pain honestly because staining anything with slats is a pain. But it turned out looking great so it was worth it. After the stain I applied finish and let it dry overnight.
9. Installing


I attached the base, installed the hinges and the shelf, and it was done!

I really love the way this cabinet came out. It was a challenge to make it using only 3 power tools. Yes there were some optional accessories I used, but they really do simplify the process and they’re accessories that I find useful in so many of my builds. I hope this 3 tool build inspires you to make something awesome with the tools that you have, even if you have to get creative to make it happen, and especially if it gets you to be creative. Happy New Year friends, and Happy DIYing!
Save this for later
I hope you enjoyed this project! If so, make sure to Pin It for later!


