Joinery can feel really intimidating when you’re first getting started in the DIY world, but it shouldn’t be! So I’m breaking down different types of joinery along with examples of when to use each one. I’ll also show you what tools and materials you’ll need so you can feel more confident diving in. Keep reading for a mix of beginner friendly and slightly more advanced joinery methods!
This post contains affiliate links, which helps support more projects on my website! For my full disclosure policy regarding affiliate links, click here!
Want to see these builds in action? Make sure to subscribe to my channel!
1. Pocket Hole Joinery

Tools
Materials
Pocket hole joinery is one of my favorite ways to build. I have a handful of pocket hole jigs, ranging from the simple Kreg Pocket Hole Jig to the more robust Kreg Foreman. The process of drilling a pocket hole and joining two pieces with a pocket hole screw creates a surprisingly strong connection. Pocket holes are easy to hide on the back or inside of a piece of furniture, and when you can’t hide them, pocket hole plugs are a great solution. Once plugged, it’s easy to sand and stain or paint to match the rest of your piece. Below, you can see how Shara and I used pocket holes to assemble my workshop cabinets, and how I used them again when building my basement closet shelves.
2. Screws + Glue

Tools
Materials
Using screws and wood glue is a great way to start building without needing jigs or complicated tools. If you have a drill, you can pre-drill holes to prevent the wood from splitting. Just apply glue to the joint, clamp the pieces to keep them aligned and under pressure, then drive in your screws to secure everything in place. This type of joinery is perfect for shop furniture or quick builds where exposed screws won’t affect the final look. It’s not the fanciest method, but it’s fast, simple, and gets the job done. I used this method to build this dog bed with built-in storage!
3. Dowel Joinery

Tools
Materials
Dowel joinery is a simple and effective way to build a strong piece of furniture, especially when the aesthetics matter. Dowels are completely hidden once the piece is assembled, and they not only create strong joints, but also help align your parts perfectly. A doweling jig kit is a great way to get all the components you need in one package. I’d recommend this type of joinery for beginner to intermediate woodworkers. So if you’re just starting out and ready to level up your joinery skills, this is a great place to begin. I used them for this storage cabinet and they worked extremely well.
4. Simple Mortise + Tenon

Tools
MAterials
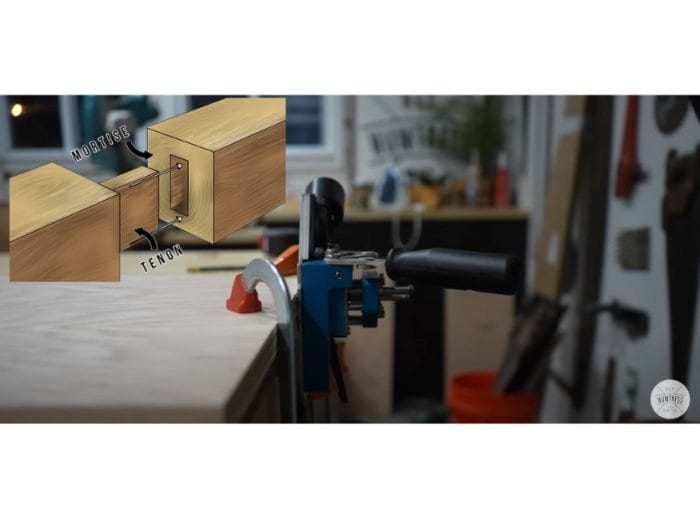
Mortise and tenon joinery has stood the test of time. It adds both strength and stability to your piece. I’d consider this a more intermediate level of joinery, and it does require a bit more equipment. You can use a tool like the Kreg MortiseMate to make the process easier and allows you to cut mortises using just a drill. When I challenged myself to build a cabinet using only three power tools, the MortiseMate was what I used to align and join the entire piece.
5. Dovetail Joinery

Tools
MAterials
If you’re ready to try a more advanced type of joinery you may find yourself experimenting with dovetails. For this particular box, I used dovetail joints, which involved quite a bit of hand saw and chisel work. It was definitely time-consuming, but incredibly satisfying to create such a beautiful piece by hand. Dovetail joints are perfect for boxes or drawers, especially when you want a strong joint that shows off your craftsmanship.
Joinery doesn’t have to be intimidating, and I hope these examples help you feel more confident tackling your next project. Whether you’re building quick shop furniture or crafting a detailed box, there are plenty of ways to assemble your pieces, and plenty of tools to help you do it. You may even find a style of joinery that works well for most of your projects and really master it. However you choose to build, I just hope you’re out there making! I’ve got some fun room makeovers and more Tool School projects coming your way, so be sure to stay tuned. Until then, Happy DIYing, friends!
Save this for later
I hope you enjoyed this project! If so, make sure to Pin It for later!


